
Drywall Repair: Patching Holes Without Calling a Pro

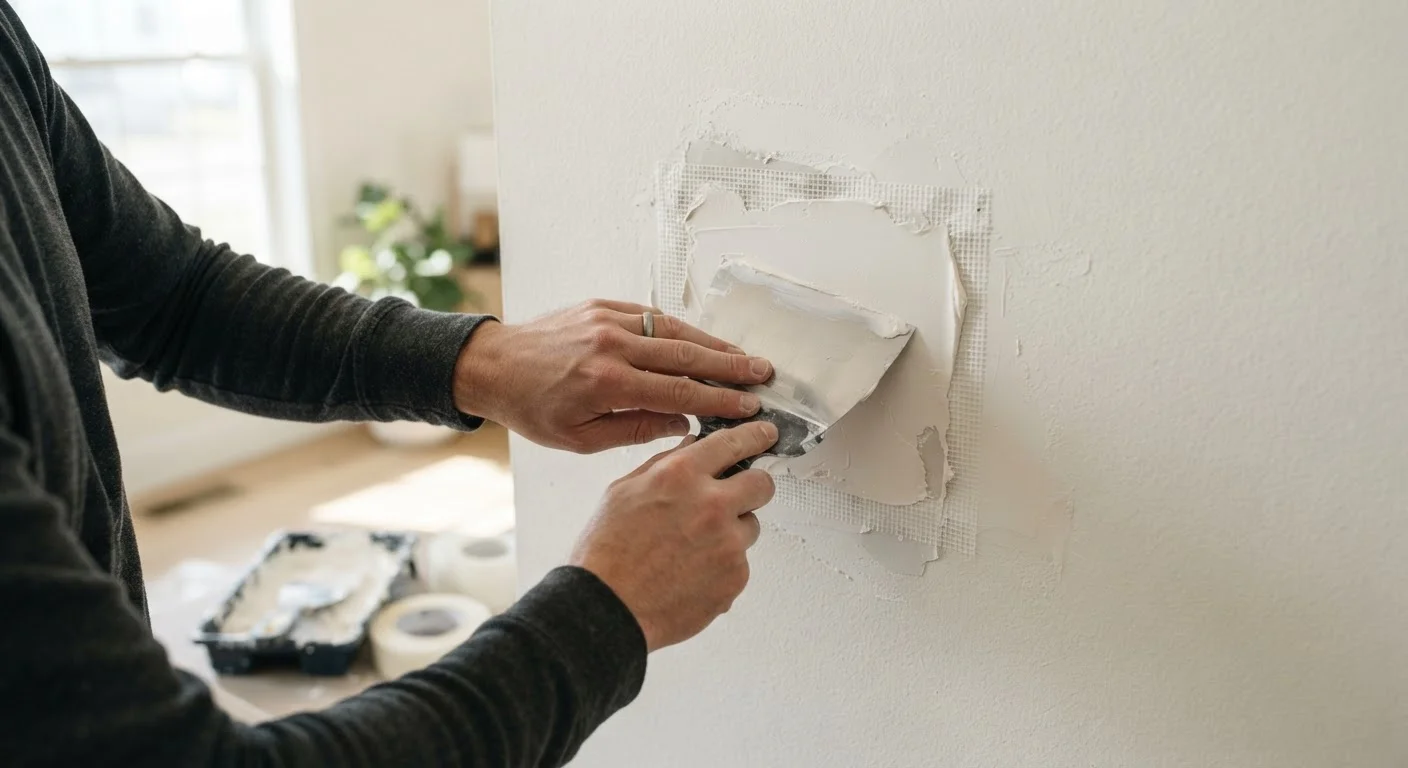
Photo: AnswersVista.com | Trustworthy Information Every Day editorial
Key Takeaways
- The repair method depends on hole size - nail pops, small holes, and larger voids each require a different approach.
- Applying multiple thin coats of joint compound produces a smoother, less visible repair than one thick coat.
- Sanding, priming, and feathering the patch edges are essential steps for a seamless, paint-ready finish.
- Mesh tape and backer boards give larger patches the structural support needed to prevent future cracking.
- Skipping primer before painting almost always results in a visible patch that shows through the topcoat.
Why Drywall Repairs Go Wrong
Most failed drywall patches share the same root causes: skipping tape on holes that need it, applying compound too thickly in one coat, not feathering the edges wide enough, or painting without primer. Understanding why each step matters makes it much easier to get a clean result on your first attempt.
Joint compound shrinks slightly as it dries, which is why one thick coat almost always cracks or leaves a visible depression. Thin, layered coats let each application cure fully and give you control over the final surface level. Feathering - spreading each coat progressively wider than the last - blends the patch into the surrounding wall so gently that the transition becomes invisible.
Check for Wiring and Plumbing First
Texture is the other factor many DIYers overlook. If your walls have a knock-down, orange peel, or skip-trowel texture, a smooth patch will stand out even under paint. Light texture can be approximated with a sponge, a stomp brush, or a can of spray texture. Match your existing texture before priming.
Tools and Materials You'll Need
What you will need
Putty knife or drywall knife (4-6 inch)
Applies and smooths joint compound over the patch area.
Wide taping knife (10-12 inch)
Feathers the outer edges of compound for a gradual, invisible blend into surrounding wall.
Self-adhesive mesh drywall tape
Reinforces patches over 1 inch to prevent cracks from re-forming.
Pre-mixed all-purpose joint compound
Fills and levels the repair area; requires multiple thin coats.
Sanding sponge or 120/220-grit sandpaper
Smooths dried compound between coats and before priming.
Self-adhesive patch plate (aluminum or fiberglass)
Provides instant backing for holes between 1 and 4 inches without cutting new drywall.
Drywall backer board or scrap wood
Supports large replacement patches (over 4 inches) from behind the wall.
Drywall screws and a drill/driver
Secures backer boards and replacement drywall pieces for large repairs.
For most repairs under 4 inches, you can get by with a putty knife, mesh tape, a tub of pre-mixed joint compound, sandpaper, and primer. Larger repairs add a few more materials, but nothing that requires specialized skills to use.
Step-by-Step Repair Instructions
Identify the damage type and choose your method
Not every hole calls for the same fix. Use this quick guide:
- Nail holes and minor dings (under ½ inch): Fill directly with lightweight spackling compound using a fingertip or small putty knife. No tape needed.
- Small holes (½ inch to 4 inches): Use a self-adhesive patch plate or mesh tape over the opening, then apply joint compound in layers.
- Large holes (over 4 inches): Cut a clean rectangular opening, install backer boards, cut a matching drywall piece, secure it, tape all seams, and apply compound.
Inspect the surrounding wall for soft spots, water staining, or mold before proceeding. Discoloration or a musty smell may indicate a moisture problem that needs to be resolved before you patch.
Prepare the damaged area
Use a utility knife to trim away any loose or crumbling drywall paper from the edges of the hole. For larger damage, score and cut a clean rectangle or square using a drywall saw - clean edges help the patch sit flat and bond well. Remove any protruding nails or screws and drive any nail pops about ⅛ inch below the surface with a hammer; you'll bury them under compound.
Install backing or a patch plate (for holes over ½ inch)
For holes between ½ inch and 4 inches, press a self-adhesive fiberglass or aluminum patch plate firmly over the opening, centered on the hole. Smooth out any bubbles. For holes larger than 4 inches, cut two pieces of scrap wood or a furring strip several inches longer than the hole's height. Slide each piece into the hole and hold it against the inside of the existing drywall while you drive drywall screws through the wall surface to secure it. Cut your replacement drywall piece to fit snugly, then screw it to the backer boards.
Tape the seams
Apply self-adhesive mesh drywall tape over any seams - including the edges of a patch plate or the joints around a replacement drywall piece. Press the tape firmly so it lies flat with no wrinkles. Tape is the structural layer of your repair; skipping it on anything larger than a small hole significantly increases the chance of cracking later. For nail pops and tiny dings, tape is not necessary.
Apply the first coat of joint compound
Load your putty knife with pre-mixed all-purpose joint compound and spread it over the patch in a thin, even layer. Work from the center outward, pressing firmly to force compound into the mesh or seams. The first coat does not need to be perfect - it is a foundation coat. Feather the edges slightly with your wider knife. Let this coat dry completely (typically 4-8 hours depending on humidity and temperature) before moving on.
Sand, apply second and third coats, and sand again
Once the first coat is dry, lightly sand with 120-grit sandpaper to knock down ridges - do not sand aggressively. Wipe away dust with a lightly damp cloth. Apply a second coat, extending it 2-3 inches beyond the first with your wide knife. Allow to dry, sand lightly again, then apply a thin finish coat, feathering the edges as far as needed to blend with the wall. When dry, finish-sand with 220-grit paper until the surface is smooth to the touch with no visible edges.
Prime and paint
Brush or roll a coat of drywall primer (also called PVA primer) over the entire repaired area before painting. Joint compound is highly porous and will absorb paint unevenly, resulting in a dull, flat-looking patch called flashing - priming prevents this. Once the primer is dry, paint with the existing wall color. For the most seamless result, consider rolling the entire wall rather than spot-painting. For a full guide to surface prep and painting technique, see Painting a Room: Surface Prep, Priming, and Technique.
Feather Wide for an Invisible Repair
Don't Rush the Drying Process
Getting a Seamless, Paint-Ready Finish
The difference between a patch that disappears and one that's always visible often comes down to the finish steps. After your final coat of compound is dry and sanded smooth, run your hand across the repair and the surrounding wall. The transition should feel imperceptible. If you can feel an edge, apply a skim coat - a very thin layer of compound diluted slightly with water - and sand again once dry.
Prime before you paint, every time. A drywall-specific PVA primer seals the porous compound surface and ensures your topcoat absorbs evenly. Without it, the patched area will appear as a dull or shiny spot even when the paint color matches perfectly. Once primed, paint using the same sheen level as the rest of the room - mismatched sheen is another common reason patches remain visible.
Properly done, a drywall repair requires no special talent - just patience with the drying and sanding steps. Take your time between coats, keep your compound coats thin, and the result will be a wall that looks like nothing ever happened.
The content provided on our blog site traverses numerous categories, offering readers valuable and practical information. Readers can use the editorial team’s research and data to gain more insights into their topics of interest. However, they are requested not to treat the articles as conclusive. The website team cannot be held responsible for differences in data or inaccuracies found across other platforms. Please also note that the site might also miss out on various schemes and offers available that the readers may find more beneficial than the ones we cover.