
Garage Organization: Turning a Dumping Ground Into a Functional Space

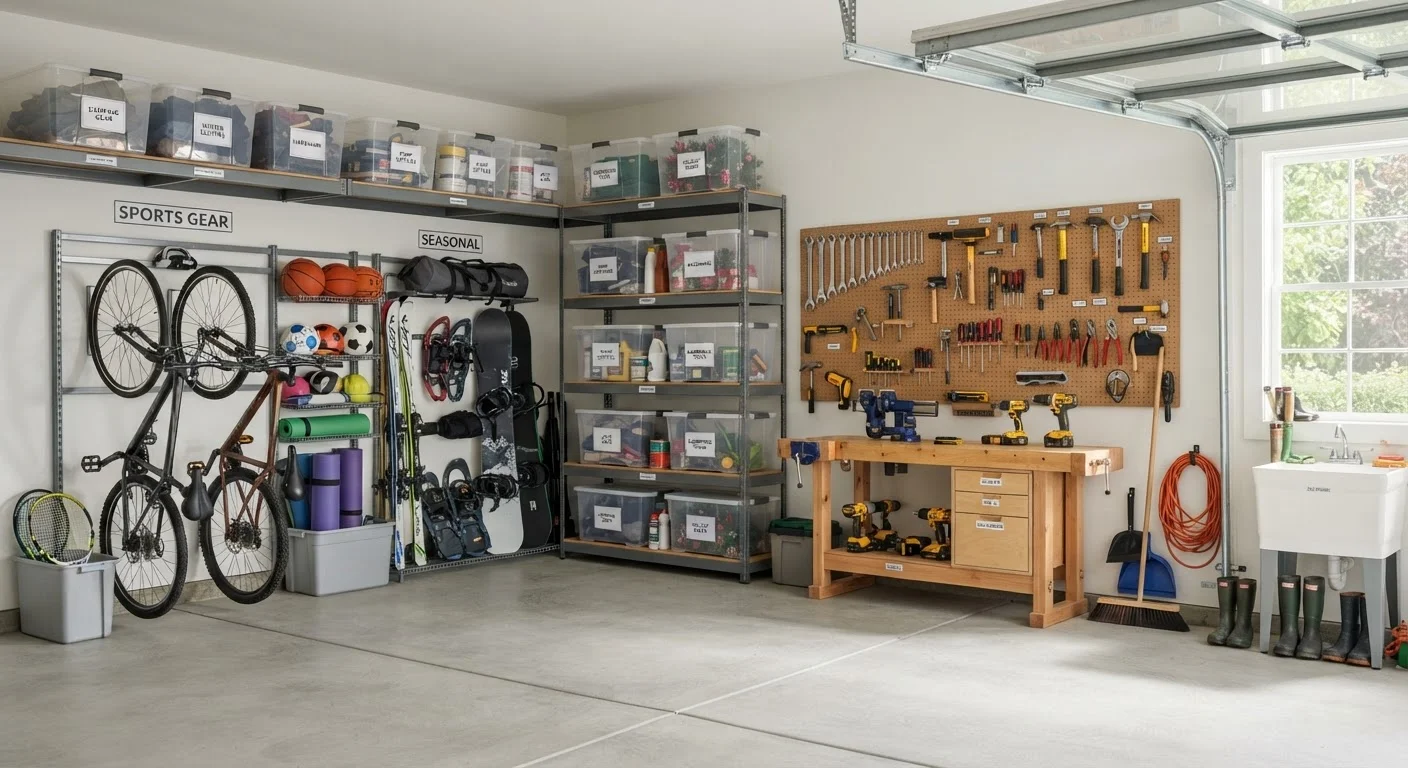
Photo: AnswersVista.com | Trustworthy Information Every Day editorial
Key Takeaways
- Sorting everything into categories before buying storage is the single most important first step.
- Dividing your garage into dedicated zones prevents clutter from creeping back.
- Vertical wall space and ceiling storage are often the most underused square footage in a garage.
- Seasonal items should be stored last - high up or deep back - since they're needed least often.
- Clear bins with labels save more time long-term than decorative storage that hides contents.
Why Garage Organization Feels Impossible - and How to Change That
The garage is the room most American homes treat as an overflow valve. Sports gear, holiday decorations, forgotten tools, and mystery boxes pile up until the car no longer fits and finding anything requires excavation. The good news: garages respond extremely well to systematic organization because they're typically one open space with few fixed constraints.
The key mindset shift is treating the garage like any other room in your home. If you've worked through a room-by-room organization checklist, apply the same audit logic here. Define what the space needs to do, then build storage around those functions - not the other way around.
Before you buy a single shelf or bin, spend time understanding what you actually have. Most garages contain items across four to six broad categories: hand tools and power tools, lawn and garden equipment, sports and recreation gear, automotive supplies, seasonal decorations, and general household overflow. Knowing your inventory shapes every storage decision that follows.
What you will need
Setting Up Your Garage for Long-Term Function
Once you've sorted and purged, the real work begins: assigning zones and choosing storage systems that fit how you actually use the space. Effective garage organization relies on three layers - floor space, wall space, and ceiling space - used in deliberate combination.
Empty the garage and sort everything into categories
Pull everything out onto the driveway where you can see it clearly. Sort items into broad categories: tools, lawn and garden, sports and recreation, automotive, seasonal, and general household. This step reveals duplicates, broken items, and things that simply don't belong in the garage at all.
As you sort, create three piles: keep, donate/sell, and discard. Be ruthless - items you haven't used in two or more years are rarely worth the floor space they occupy.
Measure your space and sketch a zone plan
Before you buy anything, measure your garage: total floor area, wall lengths, ceiling height, and any obstructions like water heaters or electrical panels. Sketch a rough floor plan and designate zones for each category you identified in Step 1.
Place high-frequency items - tools you use weekly, the recycling bin, sports gear kids grab daily - near the door or in easy reach. Low-frequency seasonal items go to the back or up high.
Install wall storage before adding floor storage
Walls are the most underused surface in most garages. Install a pegboard panel or a track-based wall system in your tool zone to get hand tools and frequently used gear off the floor and visible. Freestanding shelving units work well for bins and boxed items along other walls.
Keep wall anchors and fasteners appropriate for your wall type - drywall, concrete, and wood stud installations require different hardware. When in doubt about load-bearing capacity, consult the storage system's specifications or a home improvement professional.
Use clear, labeled bins for categorized storage
Transfer loose items into uniform clear bins with tight-fitting lids. Label each bin on the front and, if stacked, on the top as well. Group related items together: one bin for extension cords and electrical supplies, another for painting supplies, another for holiday lights.
Avoid opaque decorative bins for garage storage - you'll waste time hunting for contents every time. Standardized bin sizes also stack more safely and make better use of shelf depth.
Address ceiling space for bulky seasonal storage
Ceiling-mounted platforms or hoisting systems are ideal for storing bulky items you access only a few times a year: holiday decorations, camping tents, kayak paddles, or off-season sports equipment. Most ceiling storage solutions attach to joists and can hold significant weight when properly installed.
Check your ceiling height - you need sufficient clearance above a parked vehicle if you use that space. Items stored overhead should be in sealed, clearly labeled bins to prevent dust accumulation.
Establish a 'return to home' habit and do monthly check-ins
Organization systems fail when the habit of returning items to their designated spot breaks down. Make it easy: every zone should have enough room to retrieve and replace items without rearranging anything else.
Set a recurring monthly reminder to do a 20-minute walkthrough. Return strays to their zones, check that bins are still labeled accurately, and catch small drifts before they snowball back into chaos.
Zone First, Shop Second
For items you store but rarely access - think holiday inflatables, camping gear you use once a year, or archived paperwork - high shelving and ceiling-mounted hoists keep them out of the daily workflow without taking up prime real estate. This same principle of using dead space creatively applies throughout the home; the hidden storage solutions guide covers approaches that translate well to garages too.
Lawn tools, fertilizers, and garden hoses deserve their own dedicated corner - especially if you actively maintain outdoor beds. For deeper context on managing a productive yard, the Lawn & Garden hub is a strong companion resource. And if composting is part of your routine, a designated bin station just inside or just outside the garage door keeps the process tidy - see the full composting guide for setup tips.
Finally, maintain what you've built. Schedule a 20-minute monthly walkthrough to return items to their zones and catch drift before it becomes another dumping ground. The same discipline that keeps a small kitchen functional - everything has a home, everything returns to it - works just as well in a garage.
The content provided on our blog site traverses numerous categories, offering readers valuable and practical information. Readers can use the editorial team’s research and data to gain more insights into their topics of interest. However, they are requested not to treat the articles as conclusive. The website team cannot be held responsible for differences in data or inaccuracies found across other platforms. Please also note that the site might also miss out on various schemes and offers available that the readers may find more beneficial than the ones we cover.